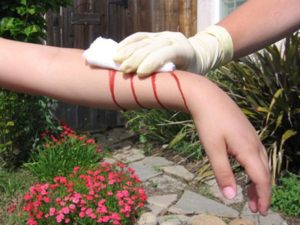
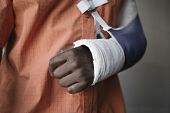
Types of dressings for wounds – Wound care and types of bandages. How to use prepared sterile dressing, gauze or lint, emergency dressings, cold compress and slings
Different types of dressing for wounds explained !
Prepared sterile dressing
This is the ideal dressing for all wounds and consists of a sterilized (germ-free) piece of gauze or lint to which sometimes a pad or roller bandage is stitched. This dressing is enclosed and sealed in a protective covering.
Before using a sterile dressing, hands must be thoroughly washed with a disinfectant preferably chlorhexidine 7.5 % or with soap and water. Loosen the protective covering and remove the dressing.
Expose the dressing as little as possible to the air. Do not breath or cough over it. Avoid fingering the surface of the dressing which is to be applied to the wound.
Gauze or lint
If a sterile dressing is not available, cover the wound with a piece of clean gauze or lint. Do not use cotton wool or fluffy fabric directly on an open wound as it will stick to the surface.
Emergency dressing
If a prepared sterile dressing or gauze or lint is not immediately available, soft old sari material, cotton bed sheets, table cover, sanitary pads, etc can be use. But their use is only temporary until a prepared sterile dressing or gauze or lint is procured.
The greatest care that must be taken in handling and applying dressing is to avoid touching with the naked fingers any part of the wound or any part of the dressing which will be in contact with the wound.
The objective is to prevent further contamination by germs. Dressings must be covered with an adequate pad of cotton wool which must extend well beyond the dressing and be kept in place with a bandage.
Cold compress or wet dressing
It can help to limit swelling and bleeding under the skin.
Making a cold compress : Take a thin towel, piece of lint, flannel, cotton wool or handkerchief and soak it in cold water. Squeeze out the water so that the material does not drip but do not wring it dry.
Keep the compress moist by dripping on more water from time to time or by replacing it with another freshly prepared cold compress. Do not apply a wet dressing where there is an open wound.
Note : A bleeding wound needs a pressure pad dressing.
These various types of dressings for wounds must be handled with care, to ensure quick healing of wounds.
BANDAGES
Objective of bandaging
To retain or fix dressings and splints in position and to immobilize fractures. Knots should never be tied over a fracture.
To afford support to an injured part (e.g. sprained ankle) or to form a sling.
To prevent infection.
To control bleeding.
To reduce or prevent swelling.
To assist in lifting and carrying casualties.
To increase the temperature of the injured part.
Signs and symptoms for a tight bandage
Skin distal to bandaging, may became bluish.
Numbness and tingling.
Nail beds become blue.
Treatment
Immediate loosening of the bandage.
Types of bandages
There are generally three types of bandages :
Triangular bandage : most useful multipurpose bandage for a first-aider.
Roller bandage.
Adhesive bandage and dressing.
Triangular bandage : It is made by cutting a piece of linen or fabric, not less than 38 inches square, diagonally into two pieces.
The bandage may be applied :
As a whole cloth : This can be spread out to its full extent, e.g.,chest bandage.
As a broad bandage : This can be done by bringing the point down to the centre of the base and then folding the bandage again in the same direction.
A triangular bandage secures dressings or pads in place.
As a narrow bandage : This is made by folding the broad bandage, once again in the same direction.
To secure the ends of a bandage a reef knot must be used. To make a reef knot, take the ends of the bandage, one in each hand.
Cross the end now in the right hand under and then over the end in the left hand thus make a turn. Then cross the end now in right hand over and then under the end in the left hand, thus making a second turn.
The knot must be placed where it does not cause discomfort or chafe the skin. If the bandage or knot is likely to be uncomfortable, a pad is placed between the bandage or knot and the body. Granny knots are apt to slip and must not be used.
SLINGS
Slings are used to afford support or rest to an upper limb. They are also used to prevent the weight of an upper limb pulling on or moving the chest, shoulder or neck.
TYPES OF SLING
Arm Sling :
This helps to support the forearm and hand in cases of fractured ribs, wounds and injuries of upper limb and fracture of forearms when splints are being used.
Application of an Arm Sling : Face the casualty and put one end of a spread out triangular sheet or bandage over his shoulder on the sound side with the point towards the injured side.
Pass it around his neck so that it appears over the shoulder of the injured side and let the other end hang down in front of the chest. Carry the point behind the elbow of the injured limb and place the forearm over the middle of the bandage so that it is at right angles of the upper arm.
Then carry the second end up to the first and tie them in the hollow just above the collar bone. Tuck the bandage into the back of the elbow, bring the point forward and secure it with a safety pin to the front of the bandage.
The base of the bandage should be at the root of the little finger so that all the finger nails are exposed. A bluish tinge of the finger nail indicates that there is a dangerous constriction interfering with the circulation in the upper limb.
Collar and Cuff Sling :
It helps to support the wrist by clove hitch bandage. To apply a collar and cuff sling bend the casualty’s elbow and lay his forearm across the chest with his fingers touching his opposite shoulder.
Pass a “clove hitch” around his wrist and tie the ends of the bandage in the hollow just above the collar bone on the injured side.
A “clove hitch” is made by taking a narrow bandage and making a loop. Make a second loop and lay it on top of first, then lay the top loop behind the first without turning.
Triangular Sling
It helps to keep the hand well raised and is applied in cases of fractured collar bone. Place the casualty’s forearm across his chest so that his fingers point towards the shoulder and the centre of the palm rests on the breast-bone.
Lay an open bandage over the forearm with one end over the hand and the point well below the elbow. Steady the limb and tuck the base of the bandage well under the hand and forearm, so that the lower end may be brought under the bent elbow and then upwards across the back to the uninjured shoulder, where it is tied in the hollow above the collar bone.
The loose point of the bandage is then tucked well in between the forearm and bandaged in front and the fold thus formed is turned backwards over the lower part of the upper arm and pinned.
Improvised Slings
Slings may be improvised in many ways; for e.g., by pinning the sleeve to the clothing; by turning up and pinning the lower edge of the coat; by passing the hand inside the buttoned coat, jacket or waistcoat. Scarves, ties, belts or tights etc. can also be used as slings.
RELATED TOPICS
Personal trainer certification
Personal injury lawyers in Austin
Online medical assistant schools


